Assembly of 26’ Sports Cam Unit
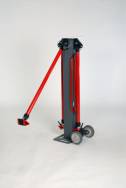 |
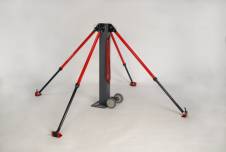
Stand the quad base up on floor plate and remove pull pin from first red leg. Pull red leg out to 45’ angle and reinstall pin. Hole will line up with bracket. | |
 |
Loosen black lock ring on red leg and slide red foot to floor and tighten black lock ring. | |
|
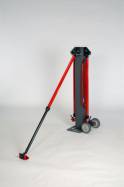
Move to the next leg (90’) and repeat. Move to the next leg (90’) and repeat plus pull up slightly on leg to remove any rocking motion before tightening the black lock ring. Check bubble level. Repeat on 4th leg and pull up slightly to remove any rocking motion before tightening the black lock ring. Quad pod unit should feel firm with the 4 legs extended. Check bubble level. If it does not feel firm and/or is not level release the black lock ring on one leg and lift slightly to remove rocking motion, check and adjust level and retighten. Check for firmness of unit by putting hand on white top plate and rocking unit. Repeat procedure again if necessary. Check bubble level and solidness of unit. Do not proceed until unit is level and firm.
|
|
 |
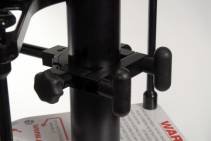
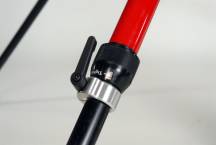 Slide the 4 silver clamp rings (one on each leg) up the
black legs to the black lock rings and tighten the levers on the side
of the silver clamp rings. Leave no gap between the black lock rings
and the silver clamp rings. The silver clamp rings are a visual reminder
that all 4 legs are locked into position. Slide the 4 silver clamp rings (one on each leg) up the
black legs to the black lock rings and tighten the levers on the side
of the silver clamp rings. Leave no gap between the black lock rings
and the silver clamp rings. The silver clamp rings are a visual reminder
that all 4 legs are locked into position. |
|
|
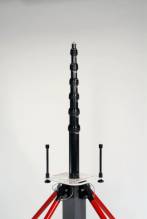
Take the 2 monitor posts (in lid on right) and unscrew the knobs from the posts. Place the posts on the corners of the white plate over the two holes. Install the 2 knobs from underneath the plate to attach the 2 posts. | |
|
||
|
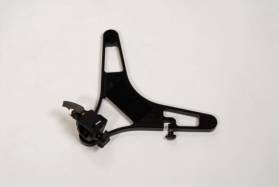
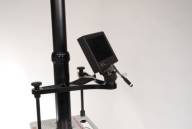
Take the monitor mount (looks like a boomerang)(top left of bottom case) and install the mount over the 2 posts with the monitor quick release on the “operator” side of the white plate and install the other 2 knobs and tighten. |
 |
|
||
 |
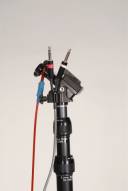
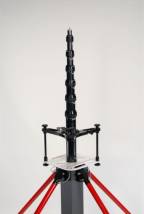
Take the camera mount pivot (in lid close to hinge) and thread into the top of the mast. Rotate the mast to thread pivot onto the mast. (It’s easier than rotating the pivot head around the mast) |
  |
|
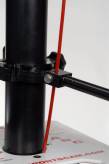
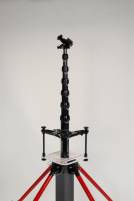
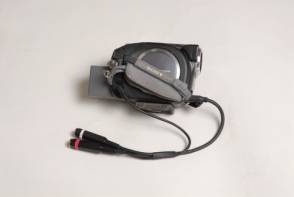
Remove the large knob from the back of the pivot and remove the red
cable from the quad pod main tube. Insert loop on red cable into knob
and rethread onto back of pivot. Install video cable into slot on side
of pivot and tighten small knob on the aluminum sleeve on video cable
with red and white plugs facing up. |
|
 |
|
 |
|
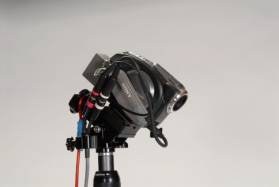
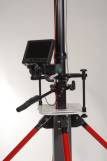
Install camera onto the quick release mount on pivot and lock on. Plug the red plug to red and the white plug to white. Turn the camera on and open the lens cap. (Video picture should be on screen of camera). | |
|
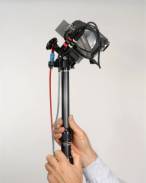
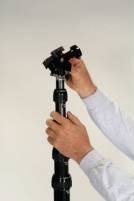
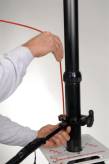
Raise the mast to the desired height by unlocking the smallest diameter clamp and raise mast by holding mast with left hand and raise smallest tube with the right hand. (Left hand acts as brake to keep pole from sliding back down.) You will feel a “stop” when the pole reaches its maximum extension. Lock the ring and go to the next largest tube and repeat. Raise mast to desired height. Be careful not to step on or tangle the cables. | |
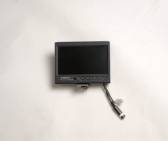 |
Remove monitor from black case and install on quick release and lock on. | 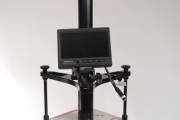 |
|
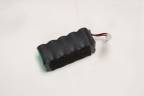
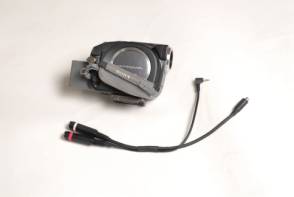
Take the black rubber covered battery from case and install on the Velcro behind the monitor and mate the battery plug with the monitor plug. |
|
|
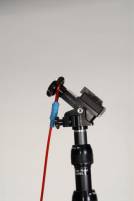
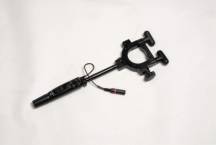
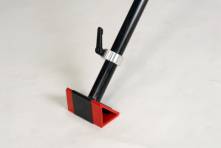
Take control handle from black case and remove the back clamp and install on pole from operators side about one inch below the monitor mount. |
|
|
Do not tighten the knobs on the control handle clamp yet, just snug. Rotate the pole to align the camera view direction with the control handle. Tighten the handle knobs at this time. Take video control cable and attach to monitor mount in center slot with plug facing up. | |
 |
Put the red cable thru the hole in the control handle by pushing in the silver button on the left hand side of the handle and thread the cable thru the handle until snug. Let go of the button and it will clamp. |
 |
|
Adjust cable slightly to get full tilt and rise of the camera. Attach video cable to plug on monitor mount. Plug the red plug to the red and the white plug to the white. Use the plugs not the wire to install and remove the connection. | |
 |
Monitor on/off button is on the lower right side of the screen. Push in to turn on. A quick push of the same button will switch the monitor to video input #2 or #1 pending which screen was last used. (If using wide and tight dual cameras) and a long push will turn it off. You can switch between #1 and 2 at will. If you have screen signal now all is good or turn on the camera video signal by using the “power on switch” on the control handle. The zoom is controlled by the rocker switch. The softer you push the switch the slower it will zoom. The “standby” and “record” indicators will show on the monitor screen. (You must set the parameter in the camera before this will happen. (Read the Sony camera instruction book.) The camera will turn off after 5 minutes to save the battery if not used. You can adjust the shut off timer in the camera to a much longer time if you wish. (Read the Sony instruction book.) If camera shuts off just move the “power on/off” switch on the handle to off and turn back on. Camera will restart. Rotate handle left and right for pan and move up or down for tilt. *Note: When lowering the mast use one hand as a brake to slow the pole as it descends. Gravity is working all the time. |
|

Stow and Go unitor26' Sports Cam |